

The Hallon Dress & The *Petite* Edits I Made
If there’s one dress I’ve had my eye on for a while, it’s been the Hallon Dress by Paradise Patterns. It’s been saved in Instagram for months - I think it was the low back and knowing I could make it out of a light linen or cotton that really intrigued me. I had a vacation to Utah coming up and that gave me the motivation I needed to buy the pattern and make this dress come to life! I chose View A with the ruffled bottom.
PRINTING THE PATTERN
You can find the pattern here, on Paradise Patterns Etsy shop, and to me, I thought the price of $15 was higher than other sellers i’ve seen but still reasonable. Let’s get to the printing process.
I usually print from my home printer which always seems to print 60+ pages, which is such a waste for me and I’m left sitting there cutting and taping each piece together which always takes me at least an hour. This time, I decided my time was more valuable and I decided to print this A0 style. I drove over to my local FedEx Printing store and decided to only print 3 pages instead for around $11 per page. I loveeed this method because I could see the entire pattern piece on one piece of paper! I knew I was going to have to make some alterations so this way of printing also made it easier for me to do that.
Side note - I posted an image of the pattern once it was printed on my instagram stories and an amazing sewist, Sabrina, reached out to let me know she goes to a local printer: Print Pro Shop - 660 NW 85th Street, Miami, FL 33150. She said she only paid about $5 per sheet. Had to shout that out and will definitely try that out next time to support a local Miami business. Will report back!
CHOOSING A SIZE
Let’s look at the details:
HEIGHT: 4’11”
WEIGHT: 105lb
BUST: 31”
WAIST: 26.5”
HIPS: 37”
I ended up printing a size 0 but when I went home afterwards and actually measured myself it seemed as though I should have printed a size 2. I decided to go for it, and spoiler, it still worked out great. Thank god this pattern is a forgiving one so I would say for petite’s if you decide to size down one it will probably be fine, although I do have to add it may have been fine because I have an A Cup. I was nervous about the size being too small but once I started putting it together I realized ways to make sure it fits right during the process of attaching the back binding or when cutting the armhole binding.
THE EQUATION
I honestly have to give Paradise Patterns and their instructions tutorials props because this was relatively easy to follow and I’m a beginner / moderate sewer. The real reason I wanted to share this process was because….. there’s math. And it DID take me a little while to get the math right and I DID have to ask my boyfriend for help but whatever! We got there =)
I’m going to share the math equation that is laid out in the pattern instructions and how I did it against my own height to shorten the pattern. Think of it as a way to double check your work!
The pattern is made for someone that is 5’7” - thank you Paradise Patterns for telling us that!
Subtract 5’7” from your own height, which in my case is 4’11"
5’7” - 4’11” = 8”
Divide 8” by 3 - because well, the instructions say to divide by thirds
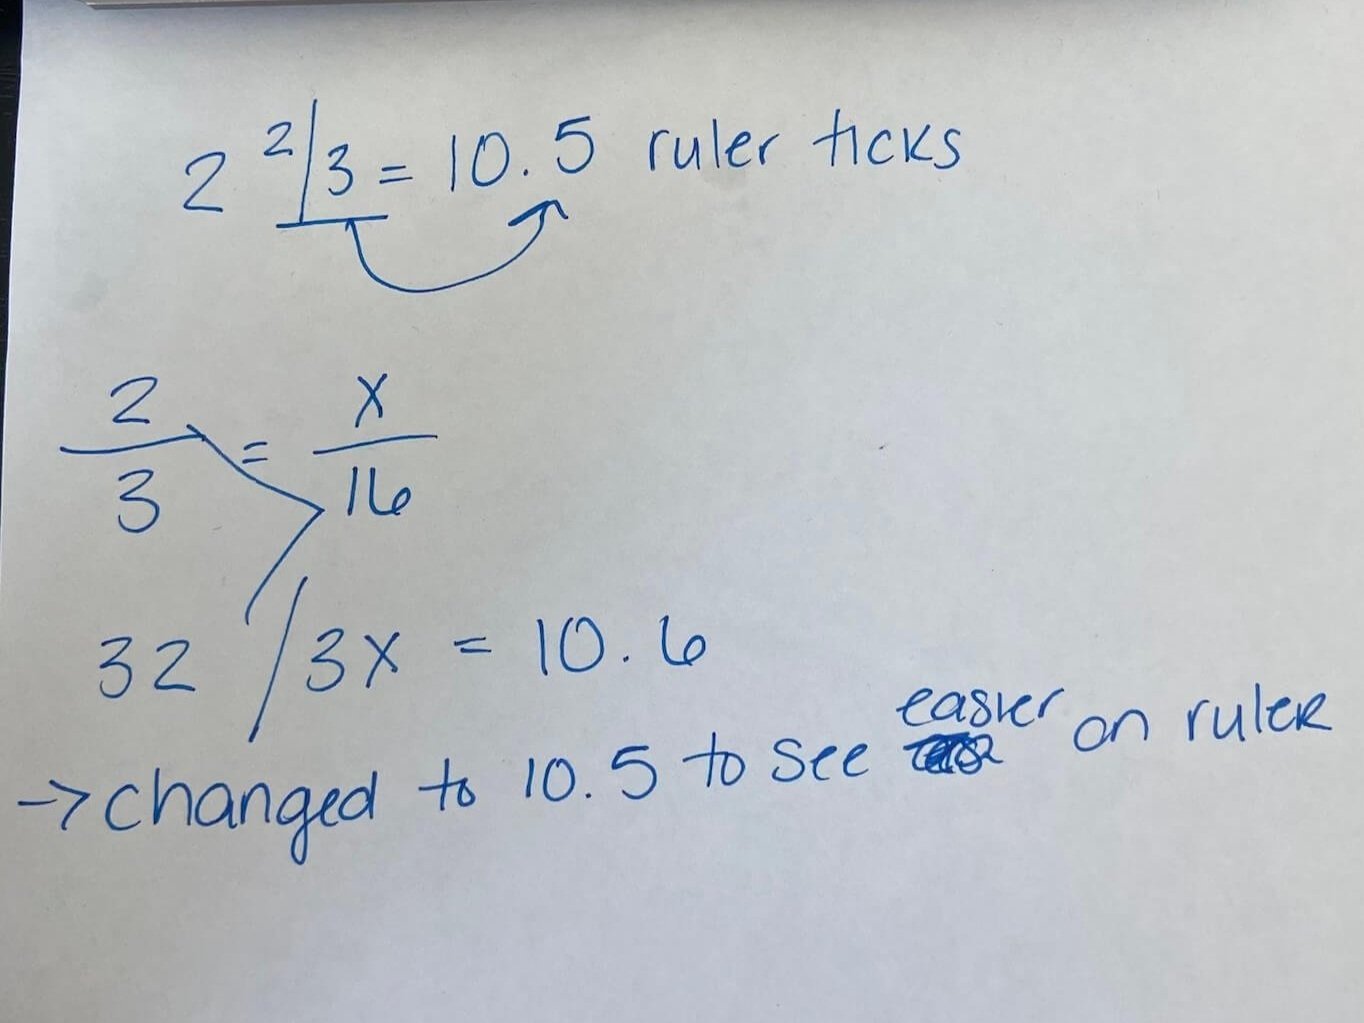
8 / 3 = 2 2/3”
2 2/3” was simplified to 2 and 10.5 ticks on ruler
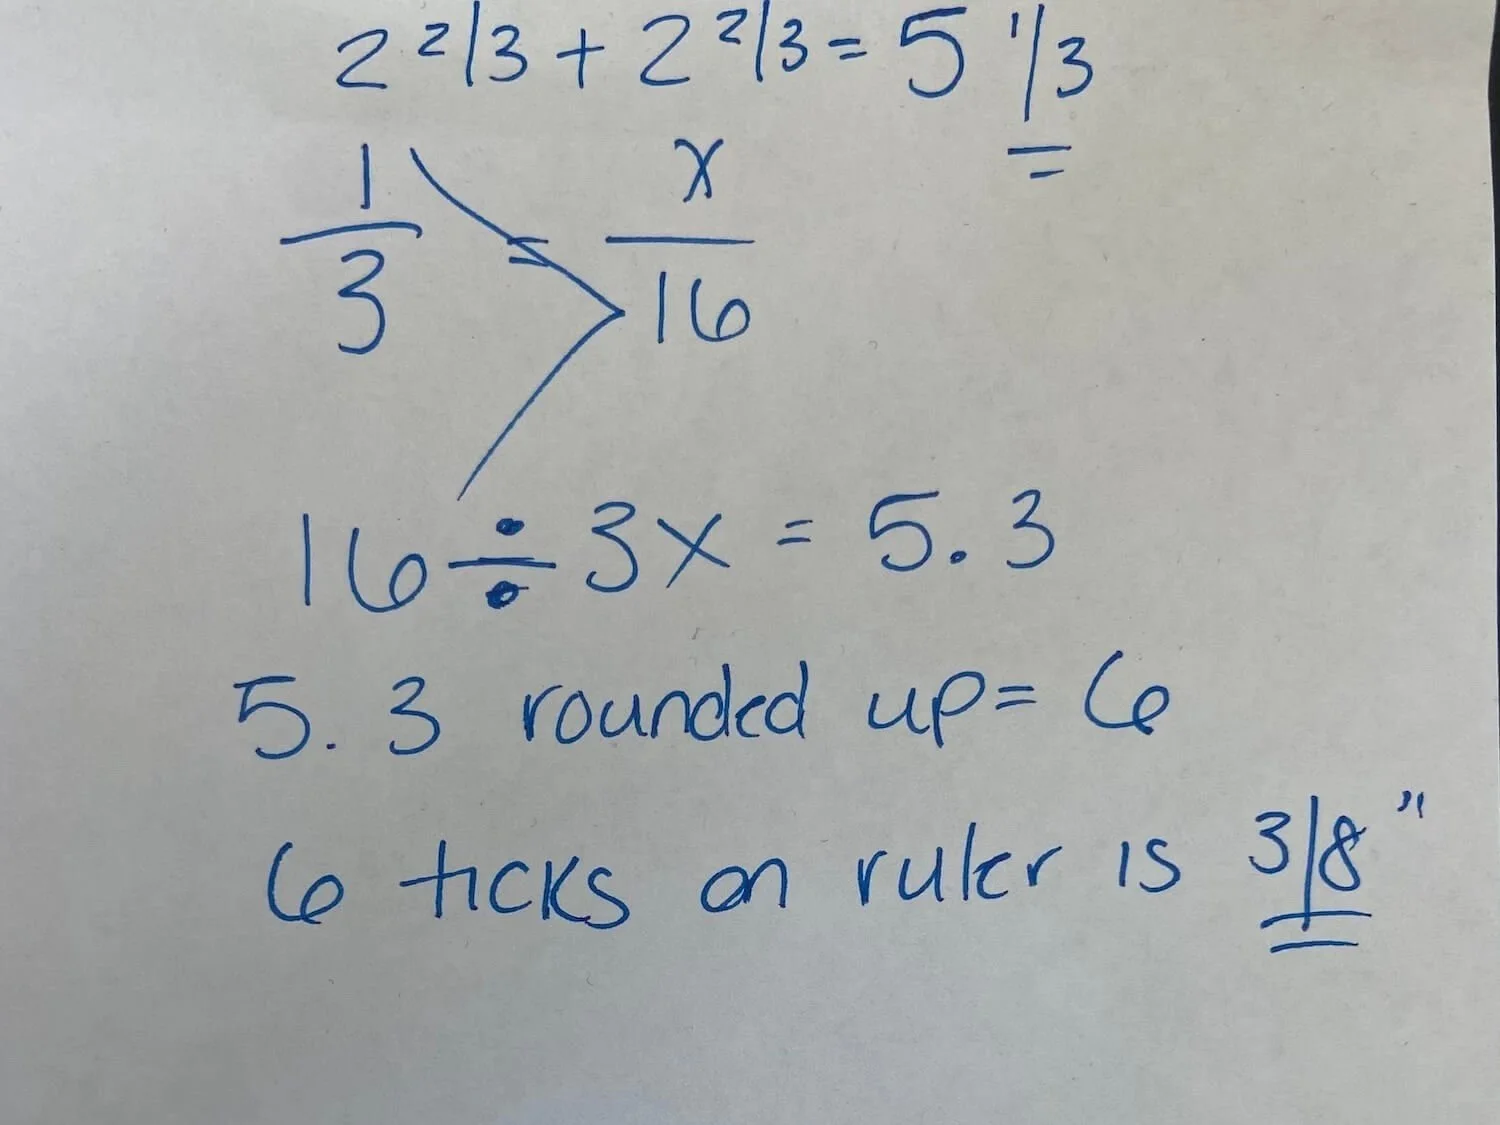
Then you have to take 2 2/3” and subtract that from the back scoop and 5 3/8” which is 2 2/3 + 2 2/3) and subtract that from the hem. Make sure the hem is equal on both the front and the back.
Here’s how my math looks on paper:
*THOUGHTS: Being in school my teachers always stressed in pattern making class how essential it was for measurements and details to be accurate to ensure the proper fit. I took that with me to almost a point where it was debilitating because I didn’t know how to deal with fractions that come up and are not on a ruler. I have now learned that it’s OK to round up slightly to get to that 3/8” mark or whatever it is just to make your measuring life easier and actually more consistent. OK back to it.
I was confused why the pattern had two lines in the area that were the “shorten here line” so I just chose the upper line. I took the measurement of 2 2/3” and measured it down from that line, then took the original pattern line and folded the paper on that line - then made sure it aligned with the new line I just measured.
I wish I had taken a photo of how the pattern looked before I smoothed it out and reconnected the lines. On the side seam I took my straight ruler and A rule of thumb is to always keep the corners where two lines meet on a straight line for about 0.5” to 1” until you start to readjust. I hope that makes sense - leave a comment or DM if you have questions and hopefully this “after” picture helps.


*ONE LAST REMINDER: Don’t forget to add your gathering notches for the back scoop. The instructions say they should be about 6” from the top and were lost when I folded the paper over. Go ahead and remark those before you start cutting your pattern.
OTHER ADJUSTMENTS
Gathering the back scoop is left up to your own discretion - the more you gather the higher it will sit on your back. I tried it on a couple of times throughout the process to see where I wanted it to fit. I love an open back moment so I wanted as much back showing as possible but still be able to move and feel safe knowing the world couldn’t see DOWN my back. Ya know? I settled at a nice gather up until 12 1/4” and that was perfect for me. If you are around my height of 4’11” that could be a good place to start for you too.
The only other adjustment I made was to the armhole bindings. It took me a couple of tries to get this to fit perfect and feel comfortable. Originally, the straps were way too tight. Like, digging into my armpit tight, and I’m assuming it’s because I had chosen that size 0 instead of 2. Then a made them a littleeee too long. Finally, I came to a happy length of 19 3/4”. For reference, the size 0 armhole binding was 17 1/2” long so I increased it quite a bit.
CLOSING
That’s all I got people! I hope this post was helpful. I love twirling in this (view A) dress and I hope you do too! Leave a comment and let me know if you made any other petite adjustments or how your experience was making this awesome dress. If you want to check out a fun reel I made check out my Instagram!
Happy Sewing!
Xx - Gianna